Did you know that nearly 70% of homeowners tackle DIY home repair projects themselves at some point? While the satisfaction of completing a project on your own is unmatched, the journey can quickly become daunting without the right tools. Whether it’s fixing a leaky sink or patching drywall, having the right equipment not only makes the job easier but also ensures your safety. In this blog post, we’ll explore the top 10 must-have tools that every DIY enthusiast should include in their toolkit. Equip yourself properly, and you’ll find that taking on home repairs becomes not just manageable, but enjoyable!
1. Hammer
The hammer is undeniably one of the most essential tools in any DIY enthusiast’s arsenal. Whether you’re assembling furniture, conducting repairs around the house, or embarking on more ambitious renovation projects, a hammer is crucial for tasks like driving nails, removing fasteners, and even performing light demolition work. Below, we’ll dive deeper into the different types of hammers, their uses, and tips for selecting the one that suits your needs best.
Types of Hammers
Understanding the various types of hammers available can significantly enhance your efficiency and precision in DIY projects. Here are some of the most common types:
1. Claw Hammer
Overview
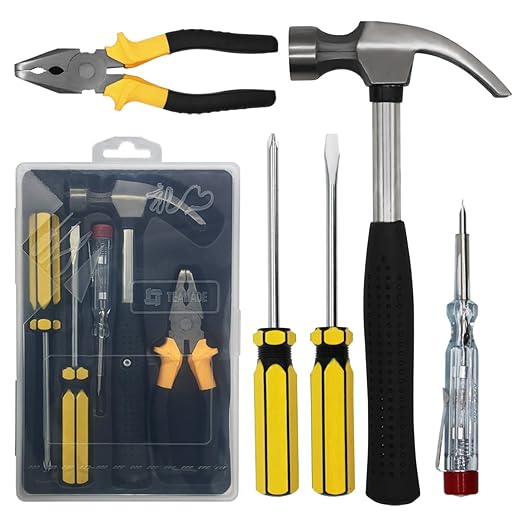
The claw hammer is perhaps the most recognized style, featuring a striking surface on one side and a curved “claw” on the other for removing nails.
Uses
- Driving nails into wood
- Removing nails
- Prying apart materials
Recommendations
- Estwing E3-16C: This 16-ounce claw hammer is known for its durability and comfort, featuring a smooth face for clean nail drives.
- Vaughan 20-Ounce Claw Hammer: With a slightly heavier build, it allows for more force to be applied, ideal for tougher projects.
2. Sledgehammer
Overview
A sledgehammer is a heavy tool designed for delivering powerful blows. Its long handle allows for increased leverage and meets larger demolition needs.
Uses
- Demolishing walls
- Driving stakes or large nails
- Breaking through tough materials like concrete
Recommendations
- Estwing E3-4S: A 4-pound sledgehammer that is forged in one piece, offering strength and longevity for demolition work.
- Dead On Tools DODFRM: This 10-pound sledgehammer features a unique soft grip handle, reducing shock to the user during heavy strikes.
3. Ball Peen Hammer
Overview
Often used in metalworking, this hammer features a flat striking face and a rounded end, making it versatile for various tasks.
Uses
- Shaping metal
- Peening rivets
- Tapping metal pieces together
Recommendations
- TEKTON 3020: This 16-ounce ball peen hammer is made from high-carbon steel, ensuring it withstands repetitive use without deformation.
4. Framing Hammer
Overview
Framing hammers are similar to claw hammers, but they have a heavier build designed specifically for construction and framing tasks.
Uses
- Driving large nails into wood
- Structure framing
Recommendations
- Milwaukee 48-22-9010: This framing hammer features an anti-vibe handle and a patented grip for reduced hand fatigue during long jobs.
Choosing the Right Hammer
When selecting a hammer, consider the following factors to ensure you choose the right tool for your specific project:
- Weight: Heavier hammers are better for heavy-duty tasks, while lighter ones provide more control for precision work.
- Grip: Look for ergonomic handles that fit comfortably in your hand. This is especially important if you’ll be using the hammer for extended periods.
- Material: Steel hammers are more durable, while fiberglass or wood handles provide shock absorption.
Key Comparison
| Hammer Type | Weight (oz) | Best Use | Recommended Model | Price Range |
|---|---|---|---|---|
| Claw Hammer | 16 | General DIY work | Estwing E3-16C | $25 – $30 |
| Sledgehammer | 10-20 | Demolition/Driving stakes | Dead On Tools DODFRM | $30 – $50 |
| Ball Peen Hammer | 16 | Metalworking | TEKTON 3020 | $20 – $25 |
| Framing Hammer | 20 | Construction/Framing | Milwaukee 48-22-9010 | $30 – $60 |
In selecting a hammer, it’s advisable to try a few in the store if possible, paying attention to how they feel in your hand. A well-chosen hammer will not only make your tasks easier but also improve the quality of your work.
The Importance of a Comprehensive Screwdriver Set
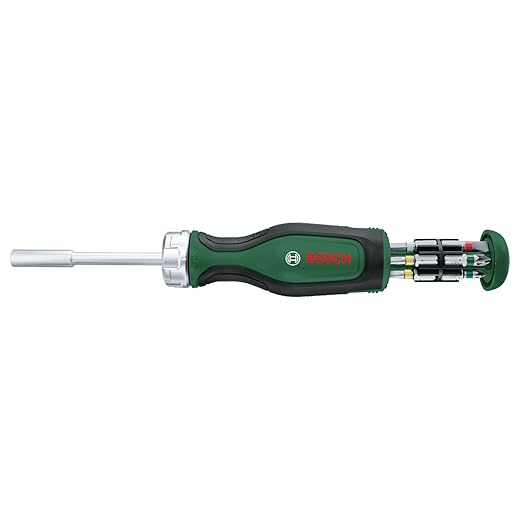
A screwdriver set is an indispensable collection of tools for any DIY enthusiast or professional. Its usefulness spans a wide range of repairs and assembly tasks, making it vital to have a diverse array of screwdrivers at your disposal.
Types of Screwdrivers
Understanding the different types of screwdrivers available can greatly enhance the efficiency of your projects. Here are the most common types:
Flathead Screwdrivers
Flathead screwdrivers feature a single flat blade, which is designed to fit into slotted screw heads. They are versatile tools that can be used for various tasks, such as:
- Fixing appliances: The Black+Decker 6-in-1 Multi-Bit Screwdriver is an excellent choice for appliance repairs, offering multiple bits for different flathead sizes.
- Furniture assembly: For assembling home furniture that comes with flathead screws, the Craftsman 9-Piece Screwdriver Set provides an array of sizes suitable for a variety of projects.
Phillips Screwdrivers
Phillips screwdrivers have a cross-shaped tip, allowing for better grip and torque when turning screws. Their applications include:
- Electronics: The Wera Kraftform Plus 354/6 VDE Phillips Screwdriver Set is designed for working with electronic components, as it ensures precision and safety while handling sensitive parts.
- Home improvement: The Stanley 66-344 4-Piece Phillips Screwdriver Set includes screwdrivers of various sizes, making it perfect for a wide range of home improvement tasks.
Manual vs. Powered Screwdrivers
While manual screwdrivers are fundamental in any toolkit, incorporating powered options can streamline your projects significantly.
Manual Screwdrivers
Manual screwdrivers are essential for precision work and offer greater control over torque. Some noted features include:
- Control: The ergonomic design of the Klein Tools 85078 Cushion-Grip Screwdriver Set allows for comfortable use over extended periods, making them suitable for intricate jobs.
- Variety: Having a set of manual screwdrivers helps cover a range of sizes and types, which is important for diverse projects.
Powered Screwdrivers
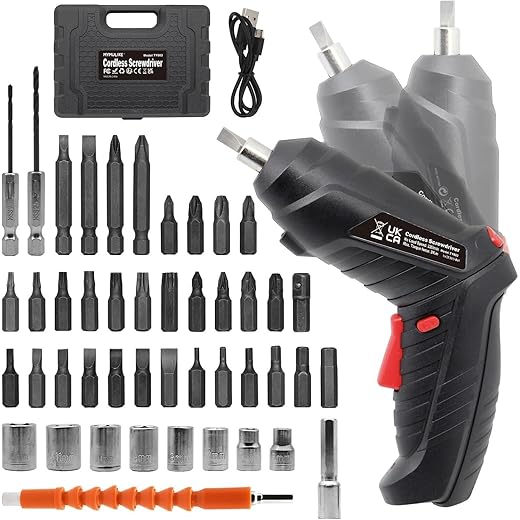
Powered screwdrivers, such as electric or cordless drills with screwdriver attachments, can save time and effort, especially in larger projects. Consider these options:
- Cordless Convenience: The DEWALT DCF680N2 8V Max Gyroscopic Screwdriver is highly rated for its lightweight design and the ability to adjust speed and torque settings according to the task at hand.
- Efficiency: The Makita XSF03Z 18V LXT Lithium-Ion Brushless Cordless 1/4-Inch Impact Driver is perfect for tough jobs, delivering powerful performance that allows you to complete projects quickly.
Comparison of Top Screwdriver Sets
| Brand and Model | Type | Key Features | Ideal Use |
|---|---|---|---|
| Black+Decker 6-in-1 | Flathead | Multiple bits, compact design, integrated storage | General repairs |
| Wera Kraftform Plus | Phillips | Ergonomic handle, precision tips, VDE certified | Electronics and sensitive work |
| Klein Tools 85078 | Manual | Cushion-grip handle, various sizes, durable construction | Detailed, controlled work |
| DEWALT DCF680N2 | Powered | Gyroscopic control, multiple torque settings, lightweight | Fastening tasks and assembly |
| Makita XSF03Z | Powered | Brushless motor, high torque, quick-release chuck | Heavy-duty tasks and projects |
Key Benefits of a Comprehensive Screwdriver Set
- Versatility: A broad range of screwdrivers allows you to tackle various jobs without needing to purchase additional tools.
- Cost-Effectiveness: Investing in a quality set saves money in the long run, as you won’t have to keep buying individual screwdrivers for different projects.
- Convenience: Having both manual and powered options ensures that you’re prepared for any task, whether it requires finesse or speed.
In summary, assembling a comprehensive screwdriver set tailored to your needs can significantly enhance your ability to complete tasks efficiently and effectively. Whether you are a seasoned professional or a DIY hobbyist, a well-rounded collection of screwdrivers—both manual and powered—will undoubtedly serve you well in every project you undertake.
The Importance of a Tape Measure in DIY Projects
When embarking on a DIY project, precision is paramount. A tape measure serves as an essential tool that helps you achieve the level of accuracy necessary for success, whether you’re hanging shelves, installing cabinets, or crafting custom furniture. Here, we will delve into the key features to consider when selecting a tape measure, tips for using it effectively, and advice for measuring in tricky spaces.
Key Features to Look For in a Tape Measure
When choosing a tape measure, certain features can significantly enhance your measuring experience. Consider the following:
- Length: Tape measures typically range from 16 to 33 feet. For most home projects, a 25-foot tape, like the Stanley FatMax 25 ft Tape Measure, provides enough length while being compact for easy storage.
- Case Material: Opt for a tape measure with a durable case, such as those made from ABS plastic or rubberized materials. The DeWalt 25 ft Tape Measure is known for its robust construction, making it more resistant to drops.
- Blade Width and Material: A wider blade (1 inch or more) increases stability when extending, which is especially helpful for long measurements. Look for a tape with a coated blade for added durability, like the Milwaukee Electric Tool 48-22-7125 tape measure with its abrasion-resistant coating.
- Locking Mechanism: A reliable lock mechanism ensures that your measurement stays in place while you work. Models such as the Komelon 5025 25 ft Measuring Tape have a robust locking feature that prevents slipping during use.
- Measurement Readability: Choose a tape measure with clear, easy-to-read markings. The Lufkin 1-Inch Wide Tape Measure features both metric and imperial measurements, allowing for greater versatility.
Proper Usage for Accurate Measuring
To ensure that your measurements are accurate, consider the following techniques:
- Start at the Right Edge: Make sure the end of the tape measure is aligned correctly at the starting point. If you’re measuring a wall, for instance, press the tape against the edge to prevent any gaps.
- Use a Tensioned Grip: Maintain tension on the tape while measuring to avoid slack, which can lead to inaccuracies. Hold the tape measure firmly at the starting point and let it extend fully to the endpoint.
- Read from the Right Side: When taking measurements, read from the edge of the tape that is closest to the object. This helps ensure that you have the correct number.
- Avoid Curved Measurements: If you need to measure around curves, use a flexible measuring tape, like the Craftsman 25 ft Tape Measure, or a piece of string that you can later measure flat against a ruler.
Measuring Tricky Spaces: Tips and Tricks
Certain spaces in your home can pose challenges when taking measurements. Here are some tips to help you tackle these scenarios:
- Corners: For right-angle corners, use a combination of your tape measure and the Pythagorean theorem to ensure your measurements are precise. For example, measure two feet along one wall and three feet along the other; the hypotenuse should measure five feet.
- High Ceilings: When working with high ceilings, a ladder may be necessary. However, a long tape like the TICKAS 33 ft Measuring Tape will allow you to measure from the ground without needing to continually climb up and down.
- Inside and Outside Corners: For inside corners, you may want to measure from the angle outward. For outside corners, ensure that your tape follows the wall’s contour without measuring from a gap. A 90-degree angle clamp can be helpful for maintaining the correct position.
- Odd Shapes: For non-standard shapes, break your area into sections and measure each side separately, or use a flexible measuring tape to get an accurate reading along curves and angles.
By understanding the features of quality tape measures and employing effective measuring techniques, you’re well on your way to executing successful DIY projects.
Essential Tools to Empower Your DIY Journey
In conclusion, equipping yourself with the essential tools highlighted in this post can transform your DIY home repair projects from daunting tasks into manageable endeavors. These top 10 must-have tools not only enable you to handle various repairs effectively but also empower you to achieve high-quality results with ease. By investing in durable and suitable equipment, you enhance both your efficiency and the overall outcome of your home improvement efforts. Embrace these tools and take your DIY skills to the next level.

