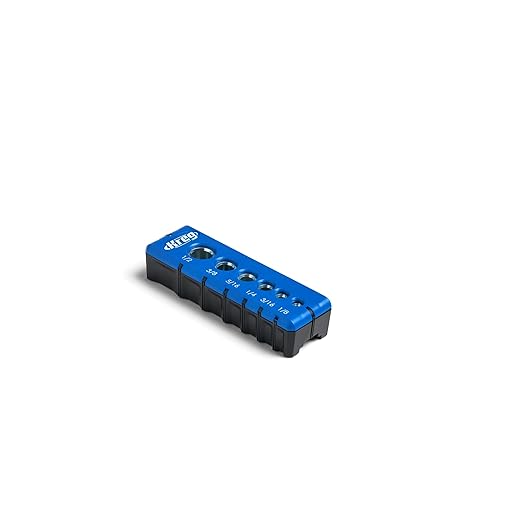
In this compassionate and insightful guide, you will discover how to elevate your woodworking skills using the Kreg K5 Pocket Hole Jig System. Designed for both beginners and seasoned woodworkers, this step-by-step approach will walk you through the essential techniques for mastering this powerful tool. With a focus on fostering confidence in your abilities, you’ll learn how to create stronger, more precise joints that will not only enhance the quality of your projects but also bring you greater satisfaction and enjoyment in your woodworking journey. Embrace your passion for craftsmanship and unlock new potential with the Kreg K5 system!
1. Familiarize Yourself with the Kreg K5 System
Read the instruction manual carefully to grasp the fundamentals of the Kreg K5 system. Watch tutorial videos to visualize the assembly and usage of the system. Focus on the following key elements:
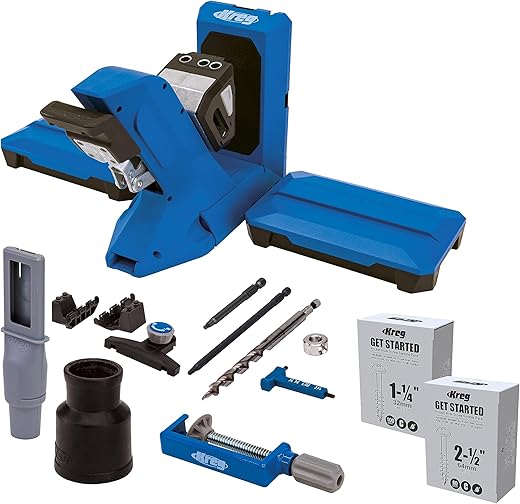
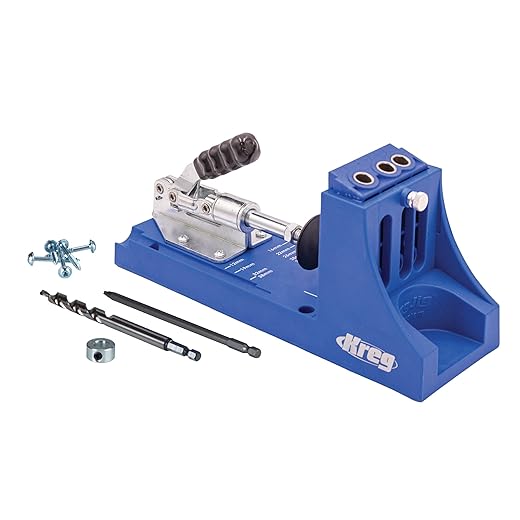
- Components: Identify each part of the Kreg K5, including the drill press, clamp lever, and material support wings.
- Features: Learn about the advanced features such as the adjustable drill guide and depth setting.
- Clamp Mechanism: Understand how the clamp operates by practicing with different materials to ensure proper alignment.
Make notes of any questions as you proceed, and consider revisiting the manual or videos for clarification.
2. Set Up Your Workspace
- Choose a workspace that is free from clutter and distractions to enhance focus and productivity.
- Ensure the area is well-lit, utilizing natural light if possible or incorporating bright artificial lighting to reduce strain on your eyes.
- Gather all necessary tools and materials within arm’s reach, including clamps, drill bits, and wood pieces, to maintain an efficient workflow.
- Organize tools in a way that allows for easy access and quick identification, minimizing downtime during tasks.
3. Adjust the Settings for Your Wood Thickness
Adjust the built-in thickness guide on the Kreg K5 to match the thickness of your wood pieces. Set the correct drill height for your pocket hole by referencing the scale on the guide. Ensure that the alignment is accurate to create strong joints by positioning the pocket holes at the correct depth. Verify the measurements before proceeding to drilling for optimal results.
4. Drill Pocket Holes
Secure your wood piece in the Kreg K5 jig by adjusting the clamp mechanism to hold it firmly in place. Ensure the wood is positioned correctly according to your project specifications. Drill pocket holes at the desired locations using the recommended drill bit, applying steady pressure to achieve clean and accurate holes. Keep an eye on the depth gauge to maintain consistency throughout your drilling process.
5. Assemble Your Joint
Align the pieces you want to join together, ensuring that the edges are flush. Apply wood glue along the joints for added strength and durability. Insert the Kreg screws into the pocket holes, tightening them securely to pull the pieces together. Make sure to wipe away any excess glue that squeezes out during assembly for a clean finish.
6. Practice on Scrap Wood
Practice drilling pocket holes and assembling joints on scrap wood before starting your actual project. Choose several pieces of scrap wood that closely resemble the material you will be working with. Set up your Kreg K5 system according to the manufacturer’s instructions. Drill pocket holes in the scrap pieces, then practice assembling the joints, paying attention to alignment and clamping techniques. Evaluate your results and make adjustments as necessary to refine your technique. Keep practicing until you feel confident in the process.
7. Explore Different Joinery Techniques
Experiment with different joinery techniques using the Kreg K5 for enhanced woodworking skills. Start by practicing face frames; cut your pieces to size, clamp them securely, and use pocket hole screws to create strong joints. Assemble cabinets by joining panels with corner blocks, ensuring that the edges are aligned, and reinforcing with pocket holes for stability. Try your hand at furniture making by designing a simple table; cut your frame and top pieces, then use the K5 to drill pocket holes for effective and invisible joins, promoting both strength and aesthetics in your projects.
8. Maintain Your Kreg K5 System
Clean the Kreg K5 system regularly to remove sawdust and debris that can affect its performance. Inspect the clamp and drill bits frequently for any signs of wear, such as chips or dull edges. Replace any worn components immediately to maintain optimal functionality. Lubricate moving parts as needed to ensure smooth operation and prevent rust or corrosion.
Maximizing Your Kreg K5 Experience
In conclusion, the Kreg K5 Pocket Hole Jig System serves as an invaluable tool for any woodworker looking to elevate their craft. By implementing the strategies outlined in this guide, including consistent practice and the exploration of new techniques, you can significantly improve your woodworking skills. Remember to care for your tools, as they are essential for achieving the best results in your projects. With dedication and the right equipment, you’ll be well on your way to creating stunning woodworking pieces.
Essential Tools Needed
- Kreg K5 Pocket Hole Jig
- Drill
- Drill Bit (for pocket holes)
- Wood clamps
- Wood screws (Kreg screws)
- Measuring tape
- Square
- Wood (for practice and projects)
- Screwdriver
- Safety goggles
- Dust mask
- Sanding tools (sandpaper or power sander)
- Workbench or stable workspace
Mastering the Basics
- Understand the Basics: Familiarize yourself with the Kreg K5 system components, including the jig, clamps, and drill bit, to take full advantage of its features
- Practice Setting Up the Jig: Spend time mastering the setup process. A properly configured jig will lead to more accurate and efficient pocket hole joinery
- Use High-Quality Materials: Select premium wood for your projects to ensure cleaner cuts and sturdier joints, ultimately enhancing your craftsmanship
- Experiment with Different Angles: Try varying the drill bit angle based on your project requirements for more versatile applications and stronger joints
- Utilize Clamping Accessories: Invest in additional Kreg clamping accessories to hold your workpieces securely in place, improving accuracy and safety during drilling
- Maintain Your Tools: Regularly check and maintain your K5 system for any wear or damage to ensure optimal performance and longevity
- Follow Kreg’s Guidelines: Refer to Kreg’s user manual and online resources for specific recommendations on drill bit depth, screw sizes, and types of wood
- Start with Small Projects: Begin with simpler projects to build confidence and refine your techniques before tackling more complex woodworking tasks
- Join a Woodworking Community: Engage with other woodworkers through forums, social media groups, or local clubs for tips, inspiration, and shared experiences
- Stay Consistent with Measurements: Always double-check your measurements and cuts before drilling to ensure precision and avoid errors in your projects
Step-by-Step Instructions for Effortless Pocket Hole Joinery
- Read the Manual: Start by thoroughly reviewing the user manual that comes with the Kreg K5 Pocket Hole Jig System. This will familiarize you with its components and help ensure safe and proper usage
- Set Up the Jig: Adjust the clamp and collar settings based on the thickness of your material. The K5 features a built-in depth stop that allows for precise drilling of pocket holes, which is crucial for strong joints
- Drill Pocket Holes: Position your workpiece securely in the jig and drill the pocket holes using the appropriate drill bit provided. Make sure to maintain a steady hand and follow the recommended speed for optimal results
- Use Pocket Hole Screws: Select the appropriate pocket hole screws for your project. Insert them into the drilled holes and tighten them using a screwdriver or power drill, ensuring a secure connection between the pieces
- Practice on Scrap Material: Before working on your actual project, take the time to practice on scrap wood. This will help you gain confidence and better understand how to align and drill effectively
Your Essential Questions Answered about the Kreg K5 Pocket Hole Jig System
How does the Kreg K5 compare to earlier versions of the pocket hole jig?
The Kreg K5 pocket hole jig offers several enhancements compared to earlier versions, such as the Kreg K3. One of the primary improvements of the K5 is its redesigned clamping mechanism, which features a front-mounted clamp for easier access and operation. This allows users to quickly and securely attach their material without needing to reposition the jig.
Additionally, the K5 includes a larger material support base, which enhances stability and allows for larger workpieces to be held more securely during drilling. The K5 also features a built-in dust collection port that helps keep the workspace cleaner by reducing wood shavings and debris.
Another significant upgrade is the inclusion of the Automatic Micro-Height Adjust System, which simplifies adjusting the drill bit height and enhances accuracy, making it easier to achieve precise pocket holes. The K5 is generally more user-friendly, with clearer markings for setting up material thickness and more durable components compared to its predecessors.
Overall, these improvements make the Kreg K5 a more efficient and effective tool for creating pocket holes, appealing to both beginners and experienced woodworkers alike.
What safety measures should users take when using the Kreg K5?
When using the Kreg K5 pocket hole jig, users should observe the following safety measures to ensure a safe working environment:
- Personal Protective Equipment (PPE): Always wear appropriate PPE, including safety goggles to protect your eyes from wood chips and debris, and a dust mask to avoid inhaling dust particles.
- Proper Setup: Ensure that the Kreg K5 is securely mounted on a stable work surface. Position it in a way that allows for adequate space and movement.
- Tool Inspection: Before use, inspect the Kreg K5 for any damage or wear. Ensure that all components are functioning properly and that any adjustments are securely locked in place.
- Use Clamping: Securely clamp your workpiece to prevent it from moving during drilling. This will enhance both safety and accuracy.
- Awareness of Cutting Tools: Be cautious when handling drill bits and other sharp tools. When changing bits or adjusting the jig, ensure that the tool is unplugged to prevent accidental activation.
- Keep Work Area Clean: Maintain a clean workspace to reduce the risk of slips, trips, or falls, and to avoid distractions.
- Power Tool Precautions: If using a drill, ensure it is appropriate for the task and that it is correctly set up with safety features enabled.
- Follow Manufacturer Instructions: Always adhere to the guidelines and instructions provided by Kreg for optimal and safe operation of the K5 pocket hole jig.
By following these safety measures, users can minimize risks and promote a safe working environment while using the Kreg K5.

