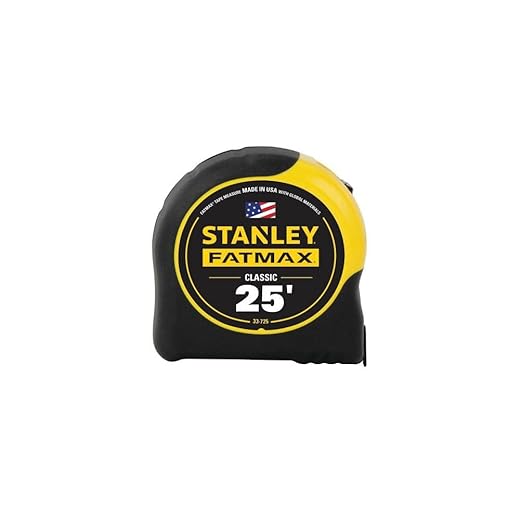
Choosing the right tape measure size is essential for achieving precision and efficiency in any project you undertake. Whether you’re a seasoned builder, a weekend DIY enthusiast, or a crafty creator, the right tape measure can make all the difference in your work. In this step-by-step guide, we will explore how to select the tape measure size that best fits your unique needs, with a special emphasis on the popular Stanley FATMAX 25-Foot Tape Measure. Our goal is to empower you with the knowledge to make informed choices, ensuring your projects not only succeed but also bring you enjoyment and satisfaction.
1. Assess Your Project Needs
Evaluate the types of projects you will be undertaking before selecting a tape measure. Determine if your needs lean more towards measuring long distances for construction, such as framing a house or installing drywall, which requires a tape measure that extends to 30 feet or more. Alternatively, consider scenarios where shorter lengths are sufficient, like measuring furniture dimensions or hanging pictures, where a 10 to 25-foot tape measure may suffice. Prioritize functionality based on these considerations to ensure you choose the right tool for each project.
2. Consider the Measurement Range
Determine the maximum length you will need to measure for your project. For most standard tasks, a 25-foot tape measure, such as the Stanley FATMAX, provides sufficient versatility and ease of use. Consider the scale of your project; if you anticipate needing to measure larger areas, opt for a tape measure that extends beyond 25 feet, ensuring you can accommodate all necessary measurements without interruption. Assess the specific dimensions of your workspace to decide the appropriate length, and choose a measuring tool that aligns with those requirements.
3. Evaluate the Width of the Tape
Assess the width of the tape before starting your measurement. Choose a wider tape for longer measurements, as it provides increased rigidity and reduces the risk of bending or breaking. Utilize a 1-inch or wider tape for optimal support, ensuring consistent accuracy throughout your measurement process. Keep the tape flat against the surface to maintain alignment and improve reliability.
4. Look for Additional Features
- Identify special features that can enhance your projects, such as:
- A locking mechanism that holds the tape in place for longer measuring tasks. This prevents slippage, ensuring accurate measurements.
- A magnetic hook that allows you to attach the tape measure to metal surfaces, providing hands-free convenience while measuring.
- A built-in level that helps verify if surfaces are even, saving time and ensuring precision during installation or alignment tasks.
- Consider how these features will specifically benefit your tasks. For example, if you frequently work alone, a magnetic hook will simplify your measuring process significantly.
5. Check Durability and Build Quality
Evaluate the material composition of the tape measure. Look for high-quality plastics or metal cases, which contribute to its overall robustness. Inspect the locking mechanism; it should engage smoothly and hold securely under pressure. Test the retractable feature by pulling the tape out and watching for any jamming or uneven retraction, as this can indicate potential weaknesses in construction. Check for additional protective features, like rubber grips or shock-absorbent casing, which enhance durability in demanding environments.
6. Review the Display Mechanism
- Ensure measurement markings are prominent and legible.
- Check for bold lines that enhance visibility against the tape’s background.
- Look for contrasting colors that make readings easier, especially in low-light conditions.
- Test readability by viewing measurements from different angles and distances.
- Replace tape measures with poor visibility characteristics to improve accuracy during projects.
7. Consider Portability and Storage
Consider how you will carry your tape measure by opting for a compact design featuring a belt clip or case. Look for products that allow easy attachment to your belt or tool bag, ensuring swift access during projects. Choose models with a protective case that not only shields the tape measure from damage but also keeps it securely stored when not in use. For instance, select a tape measure with a sturdy retractable mechanism and a locking feature, so it remains in place while measuring.
8. Compare Prices and Brands
- Browse various retailers, both online and in-store, to gather price information for the products you’re interested in.
- Create a list of brands that offer similar products, not just Stanley but also alternatives that might fit your needs.
- Compare features, materials, and performance ratings of different brands to assess their value relative to their price.
- Investigate customer reviews for insights into the reliability and quality of each brand’s offerings.
- Take note of any promotions, discounts, or bundles that may enhance the overall value of your purchase.
- Make a well-informed decision by weighing the pros and cons of each option based on your research.
Finding Your Perfect Fit
In conclusion, selecting the appropriate tape measure size is crucial for achieving precise measurements in your projects. By considering factors such as the scale of your tasks, the environments in which you’ll be working, and the specific features you require, you can make an informed choice that enhances your efficiency and accuracy. With the right tape measure in hand, you’ll be equipped for success in any project you undertake.
Essential Equipment Needed
- Tape measure (various sizes)
- Ruler or straightedge
- Calculator
- Measuring tape case or pouch
- Magnetic holder (optional)
- Level (optional)
- Measuring tools for specific projects (squares, etc.)
- Safety goggles (for certain projects)
Maximize Your Measurements
- Assess the Scope of Your Projects: Consider the size of the projects you typically undertake—small home repairs may require a different tape measure than large construction jobs
- Evaluate Length Needs: Choose a tape measure that offers a length sufficient for your most extensive measurements, typically ranging from 25 feet to 100 feet for residential and commercial use
- Consider Width and Thickness: Wider and thicker tapes can be more durable and offer better readability, especially for critical measurements
- Select the Right Type of Tape: Depending on your work, opt for a standard steel tape for general use, or a flexible cloth or plastic tape for measuring fabrics or curved surfaces
- Look for Fractional Measurements: If you work with woodworking or cabinetry, select a tape measure that features fractional markings for precise measurements
- Choose a Self-Lock Feature: Opt for a tape measure with a self-locking mechanism to prevent unexpected retraction and improve safety
- Check for a Magnetic Hook: A magnetic hook can greatly assist in measurements by providing stability when measuring metal or other ferrous materials
- Prioritize Visibility: Select a tape measure with easy-to-read markings, ensuring the numbers contrast well against the tape background
- Consider Portability: If you need to carry your tape measure frequently, choose a compact and lightweight model with a belt clip
- Test Durability: Look for tape measures designed to withstand wear and tear, especially if you plan to use them on construction sites or outdoor projects
Step-by-Step Guide to Maximizing Precision and Efficiency with Your Stanley FATMAX Tape Measure
- Familiarize Yourself with the Features: Understand the components of the tape measure, including the locking mechanism, the end hook, and the measuring scale (imperial and metric)
- Proper Technique for Measuring: Extend the tape measure by pressing the thumb release button and pull out the tape to your desired length. Make sure the end hook is securely placed against the surface you are measuring
- Read Measurements Accurately: Once you’ve measured your item, lock the tape by pressing the thumb lock button. Read the measurement from the tape at eye level to ensure accuracy
- Use the Blade’s Hook for Precision: When measuring, hook the end of the tape onto the edge of your material for precise measurements. This is particularly useful for measuring to the inside or outside edges
- Care and Maintenance: After use, retract the tape slowly to avoid damage. Store it in a clean, dry place to prolong its lifespan. Regularly check for any wear on the tape or housing for optimal performance
Common Questions About the Stanley FATMAX Tape Measure
How durable is the casing of the Stanley FATMAX tape measure?
The casing of the Stanley FATMAX tape measure is known for its high durability due to its robust construction materials. Typically, the casing is made from a strong ABS plastic or rubber overmold, which helps protect the tape measure from impacts and drops. The design often includes features such as a reinforced case and rubber bumpers to enhance its resilience against rough handling and harsh job site conditions. Additionally, many models are designed to be water and dirt resistant, further contributing to their durability.
Does the tape measure have a standout feature, and if so, how far can it reach?
Yes, many tape measures feature a “standout” capability, which refers to how far the tape can extend without bending or collapsing. This feature is particularly useful for measuring longer distances. Standard tape measures typically have a standout of about 6 to 10 feet, while some high-quality models can extend up to 12 feet or more without support. However, the exact distance can vary based on the design and width of the tape.
How easy is it to hook the end of the tape measure onto surfaces?
The ease of hooking the end of a tape measure onto surfaces typically depends on the design of the tape measure’s hook and the type of surface being measured. Most tape measures feature a hooked end that is slightly curved or has a notch, allowing it to easily latch onto edges or surfaces such as wood or metal.
However, for more precise measurements, the hook is usually designed to move slightly—allowing for accurate measurements whether the tape is pulled from inside the hook or from the outer edge. This means that while it is generally straightforward to hook the tape measure onto surfaces, certain factors such as the surface texture and the angle at which you’re measuring can impact ease. For example, smooth surfaces may require more effort to stabilize the hook compared to rougher surfaces. Overall, the design of modern tape measures makes them relatively easy to use for most measuring tasks.

