In this step-by-step guide, you’ll discover how to select the perfect drill bits for your cordless drill, ensuring that your projects run smoothly and effectively. We understand that with so many options available, it can be overwhelming to choose the right bits for different materials and tasks. This guide empathetically walks you through the essential factors to consider, such as material compatibility, drill bit types, and sizes, so you can feel confident in your decision-making process. By the end, you’ll be equipped with the knowledge to enhance your drilling performance and achieve the best results, making your DIY or professional projects enjoyable and fulfilling.
1. Determine the Material You Will Be Drilling
Identify the materials you plan to work with before beginning your drilling project. Examine your project specifications and determine whether you will be working with wood, metal, masonry, or another substance. Each material has unique properties that affect drilling techniques and tools. For example, softwoods like pine require different considerations than hardwoods like oak. Metals vary widely as well, with aluminum, stainless steel, and cast iron each necessitating specific drill bits and speeds. Take the time to accurately assess the materials to ensure the best preparation and results.
Select the appropriate drill bits based on your material assessment. For wood, use standard twist bits or spade bits, while masonry requires carbide-tipped masonry bits to penetrate tough surfaces. For metal drilling, choose high-speed steel (HSS) bits or cobalt bits for tougher alloys. Check the specifications of each bit type and ensure they match your drilling tasks, as using the wrong bit could lead to poor performance or potential damage to your materials. Always refer to manufacturer guidelines when selecting bits to confirm compatibility and performance standards.
2. Choose the Right Type of Drill Bit
Identify your material before selecting a drill bit. For general purposes, twist bits serve well for both wood and metal, as they feature a tapered design that enhances cutting efficiency. Choose a twist bit with a point angle tailored to the material: a 118-degree angle is ideal for metal, while a 135-degree angle works best for wood. When drilling into wood, ensure you keep the speed moderate to reduce splintering. If you’re working with metal, use cutting fluid to facilitate smoother drilling and to prolong the life of the bit.
Assess the specific needs of your project when drilling into concrete or creating larger holes in wood. For concrete, select masonry bits which have a hardened tip and are designed to penetrate tough materials effortlessly. The carbide-tipped feature ensures durability and prevents wear. For larger holes in wood, utilize spade bits that allow for quick removal of material, creating holes with a flat bottom. Adjust the drill speed according to the bit: slower for masonry and faster for spade bits to maintain efficiency. Ensure your drill is positioned straight to achieve accurate results.
3. Consider the Size of the Drill Bit
Select the appropriate drill bit size based on the diameter of the hole you need to create. Assess the specifications of your project to determine the exact size required, as different applications may necessitate varying diameters. If uncertain, refer to a drill bit size chart, which can provide guidance on standard sizes and conversions from fractions to decimal equivalents, helping you make an informed decision. This practice ensures precision in your work and helps avoid mistakes that could lead to rework or material waste.
Verify the compatibility of the drill bit with your drill and ensure it fits securely in the chuck. Examine the available options in your toolbox or at the hardware store, and choose a bit that matches your chosen size. For standard applications, common bit sizes typically range from 1/16 inch to 1 inch, but specialized projects may require larger or smaller bits. Remember to double-check the measurements of the drill bit against the size requirements of the hole to ensure it meets your needs before proceeding with the drilling process.
4. Check Compatibility with Your Cordless Drill
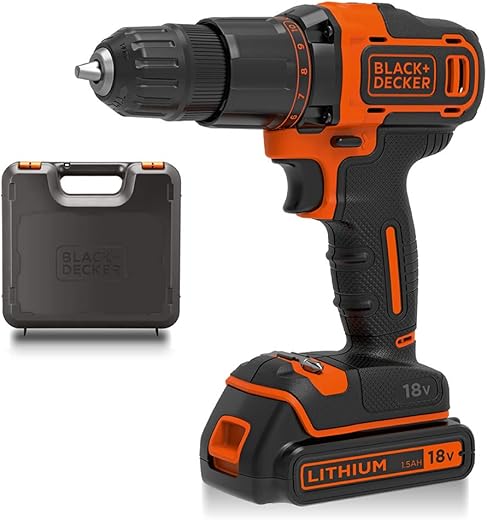
Check your cordless drill’s specifications to determine the chuck size. Most commonly, cordless drills come equipped with either a 1/4-inch or a 1/2-inch chuck. This measurement indicates the maximum diameter of drill bits that the chuck can securely hold. For example, if your drill has a 1/4-inch chuck, ensure that any drill bits you select are compatible, with shank sizes no larger than 1/4 inch. If you attempt to use a bit with a larger shank, it will not fit properly or may cause damage to both the bit and the chuck.
Examine the drill bits you intend to purchase to confirm their shank size corresponds with your drill’s specifications. Many packaging labels clearly state the shank size, making it easier to select the right bits. For instance, if you’re planning to drill into wood and choose a set of twist drill bits, check that the set includes 1/4-inch bits if that’s your drill’s size. If you have a 1/2-inch chuck drill, you can opt for larger bits, such as spade or hole saws, which often require a 1/2-inch shank. Always verify compatibility before making a purchase to avoid inconvenience during your projects.
5. Evaluate Quality and Brand
Evaluate the quality of drill bits by examining their materials and manufacturing processes. Look for bits made from high-speed steel (HSS), cobalt, or carbide, as these materials typically provide superior strength and longevity. Check the coating options too—bits with titanium or nitride coatings offer enhanced resistance to wear and heat.
Choose reputable brands that have established a track record in the market. Brands like Bosch, Makita, and DeWalt are known for their enduring performance. Review customer feedback and product ratings to assess how well these bits perform under various conditions. Recognize that investing in high-quality drill bits can lead to better drilling accuracy, reduced breakage, and overall efficiency, ultimately saving you time and reducing frustration on the job.
Final Tips for Selection
In conclusion, choosing the appropriate drill bits for your cordless drill is essential for optimizing performance and ensuring successful drilling outcomes. By comprehensively understanding the material you’re working with, selecting the correct type and size of drill bit, ensuring compatibility with your drill, and evaluating the quality of the bits, you can enhance your efficiency and achieve precise results in your projects. Implementing these guidelines will not only improve your drilling experience but also extend the lifespan of your tools.
Essential Gear List
- Cordless drill
- Drill bit set
- Wood
- Metal
- Plastic
- Masonry
- Concrete
- Measuring tape
- Drill bit gauge
- Safety goggles
- Work gloves
- Drill bit holder or case
- Chuck key (if applicable)
- Lubricant (for metal drilling)
- Dust mask or respirator
Selecting Drill Bits Made Easy
- Identify the Material: Determine the type of material you will be drilling into (wood, metal, plastic, masonry) to select the appropriate bit type
- Choose the Right Size: Use a caliper or ruler to measure the hole size you need and choose a drill bit that matches that diameter
- Consider the Bit Type: Familiarize yourself with different drill bit types (e.g., twist, spade, auger, masonry) and their specific applications
- Select the Right Coating: Look for bits with coatings like titanium or cobalt for added durability and heat resistance
- Check the Shank Type: Ensure the drill bit’s shank fits your cordless drill’s chuck, whether it’s a standard round shank or a hex shank
- Evaluate Bit Length: Consider the drilling depth required and choose a bit long enough to reach your desired depth without compromising stability
- Review Speed Ratings: Match the drill bit to the recommended RPM (revolutions per minute) for your cordless drill to optimize performance
- Buy a Quality Brand: Invest in reputable brands known for their durability and effectiveness to ensure better results and longer-lasting tools
- Consider Bit Flutes: Choose bits with the appropriate number of flutes for the material; more flutes are better for finishing, while fewer flutes are better for fast drilling in softer materials
- Keep Bit Maintenance in Mind: Opt for bits that can be sharpened or are easy to clean to extend their lifespan and maintain performance
Getting Started: Essential Steps for Effective Use of Your Cordless Drill
- Familiarize Yourself with the Tool: Before using a cordless drill, read the user manual to understand its components, including the trigger, speed settings, and clutch adjustment. Ensure you know how to charge and install the battery
- Select the Right Bit: Choose the appropriate drill bit for your task—wood, metal, or masonry drill bits are commonly used. Make sure the bit is securely fastened in the chuck before beginning your work
- Adjust the Speed and Torque Settings: Depending on the material you’re drilling, adjust the speed and torque settings on the drill. Lower settings are suitable for harder materials, while higher settings can be used for softer materials
- Practice Proper Technique: Hold the drill firmly with both hands, keep it perpendicular to the work surface, and apply gentle pressure while drilling. Avoid forcing the drill to prevent damage to the bit or material
- Maintain Safety Precautions: Always wear safety goggles to protect your eyes from dust and debris. Ensure your workspace is clear and use the drill in a well-lit area to avoid accidents
Subheading: “Common Questions About Cordless Drills
How can I safely charge and store my cordless drill battery?
To safely charge and store your cordless drill battery, follow these guidelines:
- Use the Correct Charger: Always use the manufacturer-provided charger specific to your battery type (e.g., NiCd, NiMH, or Li-ion) to prevent damage and ensure efficient charging.
- Charge in a Safe Environment: Charge the battery in a cool, dry place away from direct sunlight, heat sources, and moisture. Avoid charging on flammable surfaces.
- Monitor Charging Time: Never overcharge the battery. Follow the manufacturer’s guidelines for charging times and remove the battery from the charger once it’s fully charged. Many modern chargers automatically stop charging when the battery is full.
- Avoid Short Circuits: Keep the battery terminals clean and avoid contact with conductive materials that can cause short circuits.
- Storage Temperature: Store batteries in a cool and dry environment, ideally at temperatures recommended by the manufacturer (usually between 32°F to 80°F or 0°C to 27°C).
- Partial Discharge for Li-ion Batteries: If you are storing Li-ion batteries for an extended period, it’s best to charge them to about 40%-60% capacity before storage.
- Regular Maintenance: Periodically check and recharge your batteries if they are not in regular use to prevent complete discharge, as deep discharge can shorten battery life.
By adhering to these practices, you can maximize battery life and ensure safe usage.

