This guide offers a comprehensive walkthrough on how to effectively use a laser leveling tool, an indispensable device in construction and woodworking for achieving precise leveling and alignment. It outlines the necessary preparation steps, including selecting an appropriate location and setting up the tool. The guide then details how to project laser lines accurately, interpret the results, and make adjustments as needed. By following these step-by-step instructions, users will gain the confidence to utilize the laser leveling tool for a variety of projects, ensuring professional-grade results.
1. Gather Your Tools
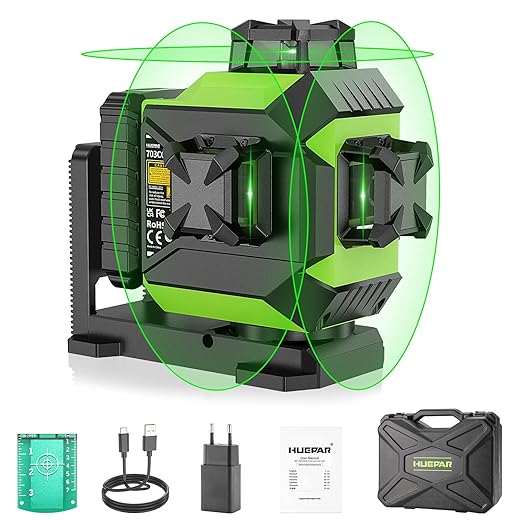
Gather all necessary equipment before using a laser leveling tool. Include the laser level, ensuring it is charged or has fresh batteries. Set up a tripod if your laser level requires one for stability. Measure your work area with a measuring tape, and have a pencil handy for marking reference points or lines on your surfaces.
2. Choose the Right Location
- Identify a flat area with a level surface for your laser level. This ensures accurate measurements and projection of the laser beam.
- Verify the stability of the ground or surface beneath the laser level. Ensure it is firm and not prone to movement or vibrations.
- Clear the area of any obstructions that could interfere with the laser beam’s path. This includes tools, equipment, or debris that may obstruct the line of sight.
- Position the laser level at a height that suits your project needs while keeping it secure and steady on the flat surface.
3. Set Up the Laser Level
Attach the laser level securely to the tripod, ensuring that the mounting screw aligns properly with the level’s base. Adjust the tripod legs to achieve the desired height, keeping in mind your specific project needs, such as installing shelves or hanging pictures. Confirm that the tripod is stable by gently shaking it; if it wobbles, reposition the legs until it stands firm. Double-check that the laser level itself is tightly fastened to the tripod to prevent any inadvertent movement, as even minor shifts can affect your measurements during use.
4. Power On the Laser Level
Press the power button to turn on the laser level. Choose the appropriate mode for your project, whether horizontal, vertical, or cross-line, based on your alignment needs. If your laser level has a self-leveling feature, wait for the device to automatically level itself; this usually involves a few moments of calibration until the laser line is steady and visible. Ensure that the unit is on a stable surface to achieve accurate results.
5. Identify Reference Points
Use your measuring tape to measure specific distances from a fixed point on the surface you intend to level. Mark these distances clearly with a pencil or chalk to create reference points. Ensure these points are visible and easy to locate later. Align the laser line precisely with these marked reference points for accurate leveling.
6. Align the Laser Line
Project the laser line onto your reference points by aiming the laser level at the intended surface. Check the alignment with your marked points, ensuring that the laser line is visible and clear. Adjust the position of the laser level, moving it closer or further away as needed to achieve proper alignment. Verify that all reference points are intersected by the laser line before proceeding with your project.
7. Take Measurements
Measure the distance from the laser line to the surfaces using a measuring tape. Hold one end of the tape at the laser line and extend it down to the surface you are assessing. Record the measurement and repeat this for multiple points along the surface to ensure accuracy. Analyze the recorded distances to identify any gaps or inconsistencies, which will indicate if adjustments are necessary to achieve a level surface.
8. Make Adjustments
Identify any discrepancies between your measurements and the laser line. Adjust the height of the surfaces by either raising or lowering them as needed. Shift the position of the surfaces laterally if they’re misaligned with the laser beam. Recheck your measurements after making adjustments to ensure everything is in proper alignment with the laser line.
Key Takeaways and Tips
In conclusion, utilizing a laser leveling tool can greatly enhance the precision of your leveling tasks, ultimately leading to superior results in your projects. By adhering to the outlined steps, you’ll achieve well-aligned surfaces and a polished finish, ensuring professional-quality outcomes every time. Embrace this valuable tool to elevate your craftsmanship and efficiency in any leveling endeavor.
Essential Gear List
- Laser leveling tool
- Tripod (if required)
- Batteries (if not rechargeable)
- Measuring tape
- Chalk line (optional)
- Marking tools (pencil or marker)
- Safety glasses (if needed)
- Extension cord (if necessary)
- Leveling rod (optional)
- Wall brackets (if applicable)
Essential Techniques Explained
- Read the Manual: Familiarize yourself with the specific features and settings of your laser leveling tool by reading the manufacturer’s manual
- Choose the Right Environment: Use the laser level in a dimly lit room or outside on a cloudy day to enhance visibility
- Set Up on a Stable Surface: Ensure the tool is placed on a flat, stable surface to avoid skewed readings
- Use a Tripod: For added stability and height adjustment, consider mounting the laser level on a tripod
- Check for Calibration: Before starting your project, verify that the laser level is properly calibrated to ensure accuracy
- Utilize Horizontal and Vertical Lines: Take advantage of both horizontal and vertical laser lines for versatile applications
- Create Reference Points: Mark the laser line on walls or surfaces to create clear reference points for your measurements
- Keep the Lens Clean: Clean the laser lens regularly to ensure the beam is clear and unobstructed
- Use Receiver for Outdoor Projects: If working outdoors or in bright light, use a laser receiver to enhance visibility
- Practice Before Major Projects: Test the laser level on scrap materials to get familiar with its operation before beginning your main work
- Align with Other Tools: Use the laser level in conjunction with measuring tapes and square tools for increased accuracy in layout
- Keep Safety in Mind: Always wear appropriate eye protection and avoid direct eye exposure to the laser beam
- Store Properly: After use, store the laser level in its case to protect it from damage and dust
- Monitor Battery Levels: Regularly check and replace batteries to ensure your laser level operates reliably throughout your projects
Step-by-Step Guide to Utilizing Your Leveling Tool Effectively
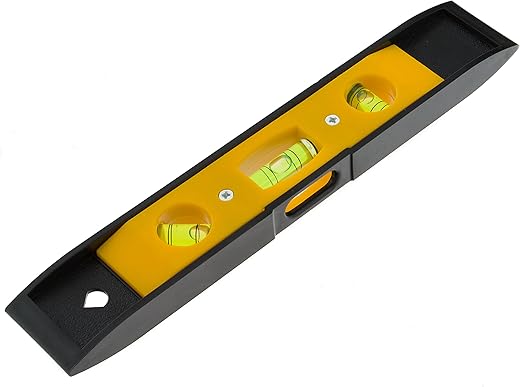
- Understand the Basics: Familiarize yourself with the components of a leveling tool, including the vial, base, and bubble. Ensure you understand how the bubble indicates levelness
- Positioning: Place the leveling tool on the surface you want to check. For larger areas, it’s advisable to work in sections by using the tool in different spots to ensure uniformity
- Adjust the Surface: Observe the position of the bubble in the vial. If the bubble is off-center, adjust the surface until the bubble is centered between the marked lines, indicating that the surface is level
- Use a Straight Edge: For more accuracy, use a straight edge in conjunction with the leveling tool. This helps in marking a consistent level line over longer distances, especially for constructing shelves or cabinets
- Double-Check: After making adjustments, always recheck the area with the leveling tool. This ensures that your adjustments were successful and the surface is indeed level before proceeding with any further work
Essential Questions About Your Leveling Tool
Can a leveling tool be used for projects outside of construction, such as landscaping?
Yes, a leveling tool can be used for projects outside of construction, including landscaping. In landscaping, leveling tools help ensure accurate grading, which is essential for proper water drainage, even terrain for walkways, and overall aesthetic appeal. Whether it’s for installing patios, laying sod, or creating garden beds, utilizing a leveling tool can significantly enhance the quality and precision of the landscaping project.
How accurate are digital leveling tools compared to traditional ones?
Digital leveling tools, such as electronic levels and laser levels, typically offer greater accuracy than traditional bubble levels. While traditional leveling tools can achieve accuracy within ±1/8 inch over a certain distance, high-quality digital leveling tools can provide accuracy up to ±1/32 inch or better.
Additionally, digital tools often incorporate advanced technology, such as sensors and algorithms, which can compensate for minor errors in setup and provide real-time readings, making them easier to use in various conditions. However, it is worth noting that the accuracy of both digital and traditional leveling tools can be influenced by factors such as the quality of the tool, environmental conditions, and user skill.
In summary, while both tools are reliable, digital leveling tools generally offer a higher degree of precision and convenience, which makes them preferred for many professional applications.
How can you determine if a leveling tool is level when checking it against a surface?
To determine if a leveling tool is level when checking it against a surface, you can follow these steps:
- Use the Vial: Most leveling tools, like spirit levels, are equipped with a liquid-filled vial containing an air bubble. Place the level on a flat surface and observe the position of the bubble within the vial. The tool is level when the bubble is centered between the marked lines on the vial.
- Check Both Directions: For accurate measurement, check the level in both horizontal and vertical orientations (if applicable). This helps ensure that the surface is level in two dimensions.
- Test Multiple Positions: Move the leveling tool to different areas of the surface to confirm that it remains level across the entire plane. This can help identify any irregularities in the surface.
- Reference a Known Level Surface: If available, use a surface that you know is level as a reference point. Check the leveling tool against this established level surface to verify its accuracy.
- Calibration: Ensure that the leveling tool is properly calibrated. Periodically check the tool against a known level surface or use a calibrated instrument to confirm its readings.
By following these procedures, you can accurately determine if a leveling tool is indeed level when assessing it against a specific surface.


