This step-by-step guide outlines the essential process for preparing surfaces before painting to ensure a flawless and long-lasting finish. It emphasizes the importance of cleaning, sanding, and priming surfaces to remove any imperfections or debris. The guide details how to assess the condition of the surface, selects the right tools and materials, and provides tips for achieving the best adhesion and coverage. By following these steps, you can achieve a professional-looking result that enhances the overall appearance of your painted project.
1. Gather Necessary Tools and Materials
Gather all necessary tools and materials before starting your project. Collect sandpaper, scrapers, cleaning solution, drop cloths, painter’s tape, and a vacuum or broom. Ensure that each item is within reach to streamline your workflow. Check that your cleaning solution is appropriate for the surfaces you will be working on for optimal results. Organize your materials in a designated space to maintain an efficient work area.
2. Remove Furniture and Cover Surfaces
- Clear the area of all furniture and decorative items that could obstruct your work space, ensuring ample room for movement and application.
- Remove rugs, lamps, and any small items from the floor to prevent them from getting damaged.
- Use drop cloths to cover floors, protecting them from dust and paint splatter; secure the edges with tape to keep them in place.
- Cover any large furniture that cannot be moved with drop cloths or plastic sheeting, ensuring that all surfaces are thoroughly shielded from potential debris.
- Double-check the area to confirm that everything is adequately covered and removed, creating a clean and safe working environment.
3. Inspect the Surface
- Inspect the surface closely for any visible damage.
- Look for cracks, holes, or areas where the paint is peeling.
- Use your fingertips to feel for irregularities that may not be immediately visible.
- Document any issues you find to prioritize repairs before starting the painting process.
4. Clean the Surface
Remove dust, dirt, and grease from the surface to ensure optimal paint adhesion. Use a cleaning solution suitable for the material you are working with; for example, an all-purpose cleaner can be effective for metals and plastics, while a diluted vinegar solution can work well on wood. Apply the cleaning solution generously with a cloth or sponge, scrubbing the surface with consistent pressure to eliminate any stubborn residues. After thoroughly cleaning, rinse the area with water to remove any remaining cleaning agents, and then allow the surface to dry completely before proceeding with your painting project.
5. Repair Damaged Areas
- Identify any cracks or holes that need repair on the surface.
- Select the appropriate filler: use spackling compound for drywall and wood filler for wooden surfaces.
- Apply the filler into the cracks or holes using a putty knife, ensuring that the area is completely filled.
- Allow the filler to dry as per the manufacturer’s instructions, ensuring it sets fully.
- Once dry, sand the repaired areas smoothly to match the surrounding surface, using fine-grit sandpaper for best results.
6. Sand the Surface
Sand the entire surface lightly using sandpaper. Focus on creating a uniform texture to enhance the paint’s adhesion. Wipe away any dust and debris with a damp cloth to ensure a clean surface for painting. Allow the surface to dry completely before proceeding with the next steps.
7. Apply Primer
- Assess the surface for any imperfections or stains that may require priming.
- Select a suitable primer based on the type of surface and the paint you plan to use.
- Apply a coat of primer evenly to the surface using a brush, roller, or sprayer.
- Ensure that you cover all areas adequately to promote optimal adhesion.
- Allow the primer to dry completely, following the manufacturer’s recommended drying time.
- Check for any spots that may need a second coat and apply it if necessary.
8. Tape Off Edges
Apply painter’s tape carefully along the edges of trim, windows, and any surfaces you want to protect from paint. Press the tape down firmly to prevent paint from seeping underneath. Cut the tape to the appropriate length and ensure it adheres smoothly at the corners for a clean edge. Remove the tape slowly and at a 45-degree angle after the paint dries to reveal crisp, professional-looking lines.
9. Final Inspection and Preparation
Conduct a thorough inspection of the surface you prepared for painting. Check for any dust, debris, or moisture that may have accumulated, as these can affect paint adhesion. Wipe down the area with a clean cloth and ensure it is completely dry before proceeding. Inspect the tape you applied; confirm that it is firmly adhered to edges and corners, preventing any paint from bleeding onto unwanted areas.
Final Steps for Success
In conclusion, ensuring the right preparation of surfaces before painting is crucial for achieving a smooth and durable finish. By following the outlined steps, including cleaning, sanding, and priming, you set the foundation for a successful painting project. Taking the time to prepare properly not only enhances the appearance of your paint job but also extends its longevity, making it well worth the effort. With these practices in mind, you can confidently embark on your next painting endeavor.
Essential Supplies Needed
- Drop cloths or plastic sheeting
- Painter’s tape
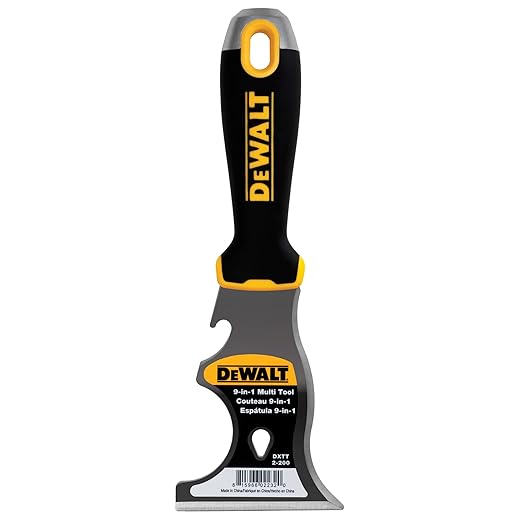
- Paint scraper or putty knife
- Sandpaper (various grits)
- Primer
- Paint brushes
- Paint rollers and trays
- Cleaning solution (e.g., soap and water)
- Rags or cloths
- Caulk and caulking gun
- Spackle or joint compound
- Ladder or step stool
- Safety goggles
- Dust mask or respirator
- Gloves
- Heat gun or hair dryer (optional for removing paint)
- Utility knife
- Roller extension pole
Surface Prep Essentials
- Clean Thoroughly: Remove dirt, grease, and dust from the surface using soap and water or a suitable cleaning solution
- Repair Imperfections: Fill cracks, holes, and other blemishes with a suitable filler and sand down to create a smooth surface
- Sand the Surface: Lightly sand the surface to create a good texture for paint adhesion. Use appropriate grit sandpaper for the material
- Remove Loose Paint: Scrape off any peeling or flaking paint with a paint scraper and ensure a stable base for new paint
- Wash with TSP: For extremely dirty surfaces, consider using trisodium phosphate (TSP) to ensure all contaminants are removed
- Dry the Surface: Ensure the surface is completely dry before painting to prevent trapping moisture, which can lead to problems later
- Prime the Surface: Apply a suitable primer to improve paint adhesion and block stains, especially on porous or previously painted surfaces
- Use a Drop Cloth: Protect surrounding areas with drop cloths to catch drips and spills during the painting process
- Tape Off Edges: Use painter’s tape to mask areas that should not be painted, ensuring clean lines and edges
- Assess Environmental Conditions: Check the weather and humidity levels, as optimal conditions can significantly affect paint application and drying
Mastering the Essentials: A Guide to Effectively Using Your Painting and Finishing Tools
- Select the Right Tools: Start with essential painting tools such as brushes, rollers, and trays. Choose the right type of brush for your project—angled brushes for corners and flat brushes for large areas
- Prepare Your Workspace: Cover floors and furniture with drop cloths or plastic sheets to protect them from paint splatters. Ensure the area is well-ventilated and free of clutter
- Practice Technique: Before painting the actual surface, practice your technique on a scrap piece of cardboard or wood. Experiment with different brush strokes and roller techniques to find what works best for you
- Mix Paint Properly: Before using paint, stir it thoroughly to ensure an even color and consistency. If using multiple cans, mix them together in a larger container to maintain uniformity
- Clean Tools After Use: Clean brushes, rollers, and trays immediately after use with soap and water for latex paints, or appropriate solvents for oil-based paints. Proper cleaning extends the life of your tools and ensures better results in your next project
Essential Tools for a Flawless Finish
What is the best way to prepare surfaces before painting?
The best way to prepare surfaces before painting involves several crucial steps to ensure proper adhesion and a flawless finish. Here’s a comprehensive guide:
- Cleaning: Begin by thoroughly cleaning the surface to remove dirt, grease, dust, and other contaminants. For exterior surfaces, a pressure washer or a sponge with soapy water can be effective. For interior surfaces, a household cleaner or a mixture of water and vinegar may suffice.
- Sanding: Sand the surface to create a smooth texture and to help the paint adhere better. Use sandpaper appropriate for the surface material (e.g., fine-grit for wood, medium-grit for plaster). Be sure to sand in the direction of the grain for wood surfaces.
- Repairing: Fill in any cracks, holes, or imperfections with appropriate fillers (e.g., spackle for drywall, wood filler for wood surfaces). Allow the filler to dry completely and sand it smooth to ensure a uniform surface.
- Priming: Apply a primer suited for the type of paint and surface (e.g., oil-based, water-based). Primers enhance adhesion, increase paint durability, and can also help to block stains and prevent peeling.
- Masking: Use painter’s tape to mask areas that should not be painted, such as trim, windows, and fixtures. This will help achieve clean lines and protect adjacent surfaces.
- Final Inspection: Before painting, inspect the surface for any remaining imperfections and touch up as necessary. Ensure the surface is completely dry and free from dust.
By following these steps, you can significantly enhance the quality and longevity of your paint application.
What is a paint scraper, and when should it be used?
A paint scraper is a tool designed for removing paint, varnish, or other surface coatings from a variety of materials, such as wood, metal, or masonry. It typically consists of a flat, sharp blade attached to a handle, allowing for precise scraping action.
Paint scrapers should be used in situations where old paint needs to be removed to prepare a surface for repainting or refinishing. This tool is particularly effective for eliminating loose or peeling paint, as well as for smoothing surfaces before applying a new coat. It is advisable to use a paint scraper in conjunction with appropriate safety measures, such as gloves and goggles, especially when working with older surfaces that may contain lead paint.

